AdamTheTech Logo
AdamTheTech
Enthusiast of Technology, Web Development, and Sci-Fi

Microsoft’s Free Virtual Machine Images

Deus Ex: Human Revolution Review

Embed dll Files Within an exe (C# WinForms)

How to use AutoPatcher

It appears that there has been some interest in using this handy tool instead of relying on MS for Windows updates, especially if you may have use for the updates again on other machines or because of a reformat.  However, there has also been a bit of confusion on how to get it and install it.

First and foremost: you must have the most recent Service Pack installed for your Operating System in order to install the hotfixes and updates with AutoPatcher.  If you don’t, you will have to download the most recent Service Pack from Microsoft.

Next, download the latest “full” release of AutoPatcher.  The full release includes all the updates and hotfixes from the latest Service Pack up to the month stated in the download.  You will have to perform a forum search for the specific Operating System.  Currently, the latest full English release is April 2006.  For your convenience, here are Windows 2000 and XP.  AutoPatcher also supports Windows 2003 and XP x64 Edition.

Feel free to install the file as soon as it finishes downloading.  Note that this is a hefty download and broadband is required.  There are also a few torrents for the full release available if you’re having trouble with the download mirrors.  You may also download the “lite” release instead of the “full” release.  The difference between the two is that the “lite” lacks the complete set of add-ons that the “full” release includes.

Next, download all of the monthly “update” releases that have been released after the latest full/lite release.  In this case, since you have the April 2006 lite/full release, you will need to download the May 2006 update and the June 2006 update.

Install the update releases in order by month, and once you finish installing AutoPatcher, go ahead start the program. The rest should be fairly self explanatory.  If you run into problems, here’s a good FAQ thread you may want to reference first if you have questions.

Upon the next update cycle, simply go to the main page here and select the version of windows you are currently running.

(Originally published on a now-defunct blog)

Data, Where Art Thou?

As mentioned in my previous blog entries, I was working on getting a fresh installation of XP SP2 up and running on my primary workstation.  For those of you who were interested in the unattended installation process, no, the drivers did not install.  Apparently, the *.inf files needed to be in the root of each driver directory.  I had most of them in sub-directories.  Oh well.

So, after I got most things up and running again, I started to repartition things around with Partition Magic 8.  It wasn’t very successful.  My first mistake was not properly backing everything up before I made changes with Partition Magic.  My second mistake was trying to do too much at once (delete a partition, resize two others, and rename some drives–6 separate tasks in all).

I set Partition Magic to run through this list of tasks and let it run overnight.  In the morning, I awoke to find that the third operation (a partition resize) had frozen at 93%.  As a result, I lost a good chunk of valuable data that I’ll probably never get back.  Sure, I had a good chunk of it backed up (thankfully), but I hadn’t done any backups lately for that drive, so I lost a lot of my newer stuff.

This whole mess resulted in coming up with some rules of thumb when using Partition Magic:

1) Backup everything you want to keep that is on the hard drive(s) that you are repartitioning.  Even if it’s to a temporary location, such as a spare hard drive that you were planning on using later.  Or, maybe borrow one from a friend if you have to.  If something goes wrong, at least you’ll still have your data somewhere if you don’t already have a permanent backup solution in place.

2) Unless you have a good reason, convert all of your partitions to NTFS.  NTFS is less likely to “break” than FAT32, and it’s more likely to recover data from an NTFS file system if it does break.  The conversion process is painless.  At a command prompt, simply type: CONVERT  X:  /fs:ntfs    “X” being the drive letter for the partition you wish to convert to NTFS.  Two situations where you may want to keep FAT32 are when you’re running a dual-boot Windows/Linux box (where the FAT32 partition is used to share files between the two Operating System platforms), or when you’re running Windows 9x Operating Systems dual or multi-booted with NT-based Windows Operating Systems.

3) Defragging is a good idea. This will make some disk operations go faster, plus it will make it more likely to recover data in the event that something goes wrong.  I’ve had good success with a shareware program (there is a 25 limit use on the program), called “Directory Snoop” for deleted data and on partitions that were (for the most part) still intact.  For more serious situations, I’ve had success with GetDataBack and Ontrack EasyRecovery (both of which are a bit on the pricey side).

4) Only perform one operation at a time. This may seem silly if you want to get all your repartitioning done as quickly as you can, but performing multiple tasks one after another may increase the chances of something going awry.  Changing a partition’s size counts as one operation.  Changing a drive letter counts as another, and so on.

5) Never merge partitions containing Operating Systems and/or installed programs. Merging, in general, never proves to be a clean and tidy operation.  I usually delete and resize if I need to perform a “merge”.  If you do try to merge partitions, especially with an O/S or installed programs, they will play host to a whole world of headaches.  Partition Magic will attempt to rectify any references to drive letters when necessary, but often times, references are missed in the registry and/or within specific programs themselves.  The best thing to do is to backup what you need and start fresh, or more-or-less leave things the way they stand.

The point to all of this is there is one thing that is most valuable about a computer.  It’s not that expensive lightscribe DVD burner, or BFG 7800GT, or even that dual-core AMD X2…it’s the data that is stored on the hard drive.  After all, hardware can always be replaced.  Most often times, your data cannot.

(Originally published on a now-defunct blog)

Finishing the Automation Game

In my last blog entry, I wrote the generalized process I had to go through to create an unattended install CD for Windows XP SP2. Today, I’ll go through that in more detail. Before I do, let me point out the site I used as a primary reference: http://unattended.msfn.org/unattended.xp/view/web/1/

Unattended install

The first step I listed was making the Windows installation process fully automated—no annoying “pre-setup” steps.

The First thing I tried was XP SP2’s Deployment Tools, with the following guide: http://unattended.msfn.org/unattended.xp/view/web/7/

Lets just say it would have worked if I was installing XP SP1, but since SP2 comes with additional setup prompts (such as firewall configuration), this tool wasn’t much help. So, then I looked at some of the manual configuration commands and “preconfigured” several setup features, such as allowing the selection of partitions and disk formats (I have a multi-boot system, so I needed the ability to select a specific partition), configuring IE’s pop-up blocker, configuring the firewall, configuring driver source locations, configuring the permissions for a new user account, and turning on the feature that allows automated program installations upon first boot.

For those of you who wonder why many people still use the command line within Linux, this is a good example why that is: The GUI tools did not allow me to configure everything to the point where I needed, so I had to go in an manually add code to the configuration file. GUI overlays for native command line applications often do not provide for every single option you may need, especially if they are 3rd party or overly simplified.

Anyway, I digress.

Slipstreaming the Latest Hotfixes

The next tasked I embarked upon was integrating all the current hotfixes from the last Service Pack up to this month’s regular update cycle. There was a tool called AutoPatcher that I thought I could pull the hotfixes from.

It took me a minute to figure out which AutoPatcher installation files I needed, so to make it easy for you guys, you need the latest Full set (which turned out to be April 2006), followed by the installation of the latest Update set (which turned out to be May 2006).

Next, the hotfixes that I needed were found in these directories:

X:/program files/autopatcher/modules/critical
X:/program files/autopatcher/modules/noncritical

I took a look at the manual way first, but I saw that it involved a lot more time and effort than I was willing to spend on this portion of the project. So, then I took a look at what automated tools were available: http://unattended.msfn.org/unattended.xp/view/web/25/

nLite proved to be quite useful for this step. What I did was since each hotfix was in an individual folder in AutoPatcher’s program directory, I used Windows Explorer to navigate the folders, then to drag-and-drop the *.exe hotfix files into nLite.

There were 4 non-critical hotfix files that caused (or seemed to cause) issues. One was a patch for WMP 10, and since I didn’t have WMP 10 integrated on the CD, which I eventually left out because it caused issues with the native SP2 install of WMP 9 (yes, nLite notifies you that this patch may be questionable to add). There was another hotfix (KB912452) for WMP10 that seemed to cause issues without WMP 10 being installed. nLite did not prompt me about it, and I eventually discovered it and left out. The third hotfix I left out was the “HighMAT CD Writing Wizard”, which was, technically, not really a hotfix patch, but a program update. The last hotfix was some sort of removal tool, which was, again, not really a hotfix patch (and nLite would not allow me to add this one at all).

So, what is my suggestion for others who want to try integrating hotfixes onto their CD? The easiest route would be to only integrate the *critical* hotfixes, and use Windows Update or AutoPatcher for the non-critical patches/hotfixes. It would definitely avoid a few headaches.

Integrating Drivers

This step wasn’t too bad. One thing to keep in mind is that you should number the directories in the order in which you want the drivers to be installed (ie, chipset drivers first, followed by video card drivers down the line). Each directory must also be added to the correct entry in WINNT.SIF file.

Automated Program Installations

This ended up being the most time consuming portion of this whole “unattended install” project. Each program had its nuances, which made it difficult to plow through them one after another. As a result, I didn’t bother to include very many because it would have taken me just as long (or longer) to install the programs manually, as it would to figure out how to install them automatically.

One of the biggest hang-ups I ran into in general was where exactly all these files were supposed to be placed, and how to get them to run. Here’s a list of solutions to all of the “gotcha” moments I bumped into. Hopefully, they’ll be of some use to you.

  1. The $OEM$ directory must be placed in the root directory, alongside the I386 folder, contrary to what several guides said.
  2. For future reference, in the WINNT.SIF file, under the “[Unattended]” section, you need this line, otherwise the contents of the $OEM$ directory will not be copied to the hard drive: OemPreinstall=Yes
  3. The RunOnceEx.cmd, and cmdlines.txt files need to be in the $OEM$ directory, and not in subfolders.
  4. If you create new user accounts, the autologon.reg and useraccounts.cmd files need to be in the $OEM$ directory, and not in subfolders.
  5. the RunOnceEx.cmd file should only call other .cmd or .reg files. It should *never* try to execute installer files, otherwise they will not be added to the RunOnceEx installation list in the registry.

Onto the programs I setup to install automatically (or rather, tried to):

DirectX 9c
This was somewhat tricky to get to install since there wasn’t much information out about it. However, I was able to find the correct installation switch that allowed it to install silently.

WMP 10
Because of the hotfix issues I had earlier, WMP 10 never ran correctly, so I slipstreamed the critical hotfixes only, and left the non-critical ones to be installed for later. Even afterwards, WMP 10 would not run correctly, and required a reinstallation anyway. So, I ended up leaving this out.

.Net Framework 1.1 SP1 & .Net Framework 2
The unattended installation procedures proved to be somewhat complex and neither ended up installing, even after using RyanVM’s silent installer packages.

As a side note, it is recommended that you install 1.1 before 2.0. You should also note that they are separate frameworks—different applications use each one individually. For instance, nLite required 2.0. Framework 2.0 also required the Windows Installer 3.1 to be installed, which proved to be a hassle to try to slipstream, so I left it alone to save time. Windows XP SP2 comes with Windows Installer 2.0, and nLite was the only program I’ve run across that actually required the newer version (besides the .Net Framework 2.0).

Long story short, unless you have a strong desire or reason to perform an unattended install with the .Net Frameworks, don’t bother because it will take a lot of time to get working correctly, and manually installing these two packages will certainly take far less time.

MS Office 2003
This actually proved to be one of the easiest to prepare, thanks to the Office 2003 Resource Kit Tool and this guide: http://unattended.msfn.org/unattended.xp/view/web/50/

It certainly was nice to have Office install with what I wanted / didn’t want, and without having to sit though the installer process. This was just about the only automated installation that was actually worth my time to walk through.

WinRAR
This was another easy one. There’s not much else to say here about it.

Symantec Antivirus Corporate Ed. 9
This isn’t exactly a run-of-the-mill end-user application that many people would use. There were a few extra instructions to follow, but other than that, it went smoothly.

Overall, I was surprised that a number of things failed to work correctly here. Partly it’s due to poor documentation or contradicting information, partly its my lack of understanding of some of these procedures, and partly…who knows what (I am referring to the issues I had with WMP 10). So, for next time, I think I’ll just do the MS Office installation as an automated installation, and not much else because all I seemed to do was waste a lot of time here (hoping to save some down the road), but it looks like it didn’t work out like that.

Creating the Bootable ISO

This part of the process was fairly easy, thankfully. You can find the guide for it here: http://unattended.msfn.org/unattended.xp/view/web/8/

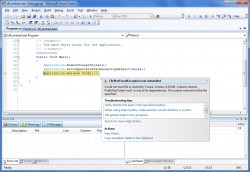
The CDIMAGE_GUI program is a very nice, easy to use application. The one snag is that some of the buttons don’t actually look like buttons. You will just see free-floating text, especially on the “creation” tab when you’re looking for the “Start Image Creation” button. Once you have your mouse hover over the text, then the button become obvious.

Testing With a Virtual Machine

This step probably saved me a pile of 15 CD-R’s or so. You can find the setup guide here: http://unattended.msfn.org/unattended.xp/view/web/20/

I ended up using Microsoft VirtualPC 2004 over VMware because it looked simplest at a quick glance. That, and there was a 45 day long trial for VirtualPC. I was able to test everything I put on my unattended installation CD ISO with the exception of the integrated drivers, since the virtual machine used generic hardware rather than my own computer’s hardware. Seeing as how useful VirtualPC was, I’m probably going to give VMware a shot to see what it can offer. After all, it’s nice not having to care whether or not you mess up the Operating System when changing settings or installing programs. You can make all the changes you want, then just go back to the beginning (however, for this, you will need something like VMware Player. VMware Workstation and VirtualPC 2004 are the programs that actually create the virtual machine environments).

Configuration Files

Now that I’ve gotten the configuration where everything appears to be working, I decided that some of you may benefit from seeing my configuration files. I will be removing usernames, passwords, CD keys and the like, so these files won’t exactly be able to be run from the get go, but you’ll be able to see how things were put together. First, here’s the directory structure:

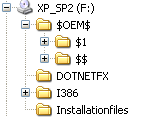
Here are the files that go into the $OEM$ folder:

  • cmdlines.txt
  • RunOnceEx.cmd
  • useraccounts.cmd
  • autologon.reg

Here are the files that go into the $OEM$/$1/install folder:

  • directx.cmd
  • Office2003install.cmd
  • winRAR.cmd
  • sav9.cmd

This file goes into the I386 folder: WINNT.SIF

Download the collection of files here.

Wrapping Things Up

Now it’s come to the point where it’s time to image my drive and install a fresh copy of XP SP2 on my machine. I’ll probably take me 4 or 5 days to actually get all my programs installed and configured. After all, I will have a lot of programs to install, which is why I never reformat willy-nilly.

So, my next blog post will probably come from my fresh shiny new Operating System installation!

(Originally published on a now-defunct blog)

Starting the Automation Game

As I mentioned in the newsletter and a past blog post, I felt it was time to reformat my Operating System and start fresh.  I was currently running XP Pro SP1, which remained more or less untouched by hotfixes (aside from some of the really critical ones).   I’ve always been wary of applying significant Operating System updates once I have everything running smoothly because of two reasons: The mantra of “If it’s not broken, don’t fix it”, and that I’ve had a number of instances where hotfixes and updates have “broken” various programs and Operating System features to the point where the problems were unrepeatable and required program reinstallations, or a complete reformat.

Now, some of the folks that know my maintenance habits on my personal rigs (usually the guys who hang out in the IRC Undernet #pcmech channel) know that I have an insane number of programs installed for any number of tasks–mostly multimedia related (ie, Dreamweaver, Photoshop, Poser, Bryce, Premiere, AutoCAD LT, Flash MX, Illustrator…and so on).  Long story short, there is *a lot* going on at any given time on my machine.

This point leads me to the core reason for the reformat: quirks.  Everybody gets them.  They’re little annoying issues that crop up that no matter how hard you try, you just can’t seem to get rid of.  I had two major quirks that I couldn’t get rid of.  The first was that WMP 9 simply “broke”, thus forcing me to revert back to version 8—the original version that rolled out with XP (XP SP2 comes with WMP 9 installed).  The other issue that cropped up was that I could not have Dreamweaver 2001 open at the same time as Photoshop CS2.  The two programs fought each other constantly, causing all sorts of strange and unusual issues.  In any case, I’m planning on upgrading to Dreamweaver 8, so I shouldn’t see that particular problem again.  There were also other minor quirks, random crashes, random terminations of the explorer.exe process, random lockups, and whatever else that seemed to make me grumble about things not working right.

So, over the period of two days or so I’ve been messing with an XP Pro SP2 installation CD and trying to make an unattended ISO out of it (An ISO is basically an image of a CD, but in this particular case, it needs to be bootable).  I had stop and go success throughout the entire process as the result of what I originally thought was a pretty good guide for this process.  In actuality, once I started getting into some of the more “advanced stuff”, the guide tended not to help so much because of numerous “gotchas” that I ran up against.

First off, there are 5 basic parts to this whole process that I eventually broke this project into.

  1. Making the installation “unattended”, meaning that XP will install and boot to the desktop without you having to do anything between the time you boot from the CD from the time you see the desktop.
  2. Integrating all the current hotfixes from the last Service Pack up to this month’s regular update cycle.  Initially, I thought this would save time from having to download from Microsoft’s servers, and it would have, but I ran up against an interesting snag with WMP (Windows Media Player).
  3. Integrating drivers with the current ISO.  Up until this time, I have been testing my unattended XP ISO within a virtual environment (mentioned below in part 5), so I have no idea if this will work correctly as of yet.
  4. Automating program installations for many common programs I use all the time and almost always install on every installation of Windows on my lineup of personal computers.  This step proved to be one of the most time consuming and trickiest sections, thanks to unclear directions and missing steps.  The steps *did* exist in the guide…just not anywhere near a useful spot (ie, under “additional/optional” info sections).
  5. Creating the bootable ISO and testing it in a virtual environment before actually reformatting my drive and installing it.  This was by far one of the best things I could have done throughout this whole procedure and the only thing that seemed to work with the first try.

So, that’s a basic look at what went awry.  Now, don’t get me wrong, once I became familiar with some of the procedures and did some digging as to why some things didn’t work (and figuring out which articles were correct when faced with serious contradictions), I eventually got most of the things working that I wanted.  However, I think my biggest hang up was that I tried to do a lot of this by hand, and right now I’m at the point where I’m going to give up on some of these things and just try to rely more on some of the automated tools.

In my next blog post, I shall detail some of the procedures I devised, some of the issues, “gotchas”, and my eventual solutions (which will probably simply include using some of the automated tools more, rather than hand-coding).

(Originally published on a now-defunct blog)


As I mentioned in the newsletter and a past blog, I felt it was time to reformat my Operating System and start fresh. I was currently running XP Pro SP1, which remained more or less untouched by hotfixes (aside from some of the really critical ones). I’ve always been wary of applying significant Operating System updates once I have everything running smoothly because of two reasons: The mantra of “If it’s not broken, don’t fix it”, and that I’ve had a number of instances where hotfixes and updates have “broken” various programs and Operating System features to the point where the problems were unrepeatable and required program reinstallations, or a complete reformat.


Now, some of the folks that know my maintenance habits on my personal rigs (usually the guys who hang out in the IRC Undernet #pcmech channel) know that I have an insane number of programs installed for any number of tasks–mostly multimedia related (ie, Dreamweaver, Photoshop, Poser, Bryce, Premiere, AutoCAD LT, Flash MX, Illustrator…and so on). Long story short, there is *a lot* going on at any given time on my machine.


This point leads me to the core reason for the reformat: quirks. Everybody gets them. They’re little annoying issues that crop up that no matter how hard you try, you just can’t seem to get rid of. I had two major quirks that I couldn’t get rid of. The first was that WMP 9 simply “broke”, thus forcing me to revert back to version 8—the original version that rolled out with XP (XP SP2 comes with WMP 9 installed). The other issue that cropped up was that I could not have Dreamweaver 2001 open at the same time as Photoshop CS2. The two programs fought each other constantly, causing all sorts of strange and unusual issues. In any case, I’m planning on upgrading to Dreamweaver 8, so I shouldn’t see that particular problem again. There were also other minor quirks, random crashes, random terminations of the explorer.exe process, random lockups, and whatever else that seemed to make me grumble about things not working right.


So, over the period of two days or so I’ve been messing with an XP Pro SP2 installation CD and trying to make an unattended ISO out of it (An ISO is basically an image of a CD, but in this particular case, it needs to be bootable). I had stop and go success throughout the entire process as the result of what I originally thought was a pretty good guide for this process. In actuality, once I started getting into some of the more “advanced stuff”, the guide tended not to help so much because of numerous “gotchas” that I ran up against.


First off, there are 5 basic parts to this whole process that I eventually broke this project into.


1) Making the installation “unattended”, meaning that XP will install and boot to the desktop without you having to do anything between the time you boot from the CD from the time you see the desktop.


2) Integrating all the current hotfixes from the last Service Pack up to this month’s regular update cycle. Initially, I thought this would save time from having to download from Microsoft’s servers, and it would have, but I ran up against an interesting snag with WMP (Windows Media Player).


3) Integrating drivers with the current ISO. Up until this time, I have been testing my unattended XP ISO within a virtual environment (mentioned below in part 5), so I have no idea if this will work correctly as of yet.


4) Automating program installations for many common programs I use all the time and almost always install on every installation of Windows on my lineup of personal computers. This step proved to be one of the most time consuming and trickiest sections, thanks to unclear directions and missing steps. The steps *did* exist in the guide…just not anywhere near a useful spot (ie, under “additional/optional” info sections).


5) Creating the bootable ISO and testing it in a virtual environment before actually reformatting my drive and installing it. This was by far one of the best things I could have done throughout this whole procedure and the only thing that seemed to work with the first try.


So, that’s a basic look at what went awry. Now, don’t get me wrong, once I became familiar with some of the procedures and did some digging as to why some things didn’t work (and figuring out which articles were correct when faced with serious contradictions), I eventually got most of the things working that I wanted. However, I think my biggest hang up was that I tried to do a lot of this by hand, and right now I’m at the point where I’m going to give up on some of these things and just try to rely more on some of the automated tools.


In my next blog post, I shall detail some of the procedures I devised, some of the issues, “gotchas”, and my eventual solutions (which will probably simply include using some of the automated tools more, rather than hand-coding).


Until next time,


Force

Editor-In-Chief

SLI Technology

Introduction

In the summer of 2004, nVidia released a new technology into the gaming market. The nVidia Corporation is known primarily for developing and supplying GPUs (Graphics Processing Units), motherboard chipsets, and contributing to other forms of multimedia hardware. The latest buzz about nVidia centers around developments made with GPU and chipset technology. These technologies are used in joint operation to produce a gigantic leap forward in gaming hardware horsepower. This technology is called the “Scalable Link Interface”.

Surprisingly, SLI technology is not a new concept. The first line of SLI products were produced by a video card company named 3dfx. SLI was first used in arcade game consoles and other professional markets. 3dfx then released a consumer version of SLI in 1998 with their Voodoo2 video card line, which was called “Scan Line Interleave” at the time. nVidia then reintroduced the basic concept on the PCI Express bus, while ATi still continues to tweak their version of a linked video card system named “CrossFire”. Many gamers who have always used ATi products are debating whether to bite the bullet and go for nVidia’s SLI, or play the waiting game and sit tight for the final release of ATi CrossFire.

nVidia’s new SLI (Scalable Link Interface) technology has brought a new incentive for gamers to invest in nVidia video card technology. Broken down into its simplest concept, SLI allows systems to utilize the power of two identical video cards for a single output display. Utilizing any more than two is merely theoretical (or hypothetical) at this point. The purpose of SLI is to offer better performance per cost of a system as a whole. Typically, a single, significantly more powerful video card rivals the cost of two less powerful cards. Plus, these two cards can be purchased separately (one initially, and the second as a later upgrade), defraying the cost of an expensive gaming system. This certainly helps builders on a lower budget and helps keep an older machine usable for a longer period of time.

With a traditional gaming computer, you would find a motherboard, a CPU, RAM, and a video card making up a system’s core components. SLI technology makes it possible to install two video cards, and have them operate simultaneously for a boost in image rendering performance.

First, we will introduce you to what the original SLI technology was, how it was used, and a brief history leading up to the current form of SLI technology, including current and past market influences leading to its demise and rebirth. This is followed by architecture comparisons between technologies, the performance benefits of current SLI technology, and the hardware requirements for building a computer that would support SLI.

After taking a look at the hardware side of SLI, we will dive into the software side of SLI, which is where the real magic happens. Discussed are SLI’s rendering and Antialiasing methods in detail, plus some comparisons between their respective settings, which are critical pieces of the SLI setup as a whole.

Wrapping up the contextual portion of the document, we end with a brief look at the innovation of gaming technology and with our analysis of the best situation where SLI can be utilized effectively, taking cost vs. performance into account. Performance in this case would equate to how efficient the technology would maintain an acceptable output response. In other words, it must maintain an acceptable frame rate and quality.

Icemat Siberia Multi Headset Review

There’s nothing better than sitting back and listening to music and hearing it as if you were sitting right there at a live concert, letting the music flow through you, send electrifying currents down your spine.  The hardware on your ears all the way to the quality of the recorded tunes you’re listening to makes all the difference in the world.  Icemat.com has produced the Black Siberia Multi Headset, which not only totes a pair of “cans”, but a uni-directional mic as well.  This interesting feature included with this headset could be directed towards gamers, VoIP users, and teleconference enthusiasts.  If that isn’t enough to take a look at, Icemat also has a Black Siberia USB Soundcard, which can be used in place of onboard sound or a PCI soundcard.  My ears are very tough to please, so through the course of the review, we’ll see how the sound quality of all these components compares and holds up.

Initial Impressions

When I first opened the shipping box, I was greeted with a nice looking box with a plastic window that allowed me to see the headset fairly easily.  So, even before I tore open the packaging, I could easily see how big this headset was and what I’d expect to be fitting over my ears.

Icemat Siberia Multi Headset Packaging

There was one thing about the USB Soundcard box I noticed right off the bat: a “compatible with a Mac” stamp on the package.  That’s certainly a plus for Mac users out there.  However, there was one downside to the product’s picture on the box: since the item itself was solid black, the photograph of the USB Soundcard didn’t show up so well, so I wasn’t quite sure what would actually appear when I opened the package.  If you dabble in painting, graphics or sewing, you have probably already figured out that that solid black objects never present well.  Don’t fret, though.  If black isn’t your color, Icemat has also has white available for both the headset and the USB Soundcard.

Products & Specs

Icemat Siberia Multi Headset Package Contents

Pictured here is everything included with the headset

Headset:

Icemat Siberia Multi Headset

  • Frequency response: 18Hz – 28,000Hz
  • Impedance: 40 Ohm
  • SPL@1kHz, 1V rms: 104dB
  • Jack: 3.5mm and a 3.5mm to 6.3mm adapter
  • Cable length: 1m/3.3ft
  • Volume regulator cable length: 1.8m/5.9ft

Microphone:

Icemat Siberia Multi Headset Mic

  • Frequency response:
  • 80Hz – 15,000Hz
  • Sensitivity 1V/Pa@1Khz): -38dB
  • Cable length: 1.8m/5.9ft

USB Soundcard:

Icemat Siberia USB Soundcard

  • USB 2.0
  • Virtual 7.1 Surround Sound
  • 12 Channel Equalizer
  • USB Cable Included

Using the Headset

Upon donning the Black Siberia headset, I was surprised at how snugly it held on to my head.  The “cans” first hold the headset in place like any other headset, but the headband on top is unique in that it is very, very easy to adjust and fit to your head.  The only downside to the headband is that it may press down on your head with a bit more force than expected, making it a little uncomfortable at first. It doesn’t take long to get used to, however.

As for the comfort level of the “cans” themselves, there is enough soft padding to make this a non-issue.  The only thing that some listeners may find annoying is their size.  For some ears, they may be too small, and their ears may not stay inside the round opening in the “cans”.  It may have been more ideal to have these “cans” oval rather than perfectly round.  Nevertheless, they are comfortable, and a large bonus is that your ears won’t get uncomfortably warm.  I’ve noticed with a number of headsets that this is sometimes a problem, but with this pair, you can use them for hours without it ever being a problem.

Operating the headset itself is quite simple.  Plug it in and turn up the volume.  Or, plug the volume regulator in to the sound card, then the headset into the volume regulator.  The control over the volume using the volume regulator is quite good.  The sound volume responds quite well.

Operating the headset itself is quite simple.  Plug it in and turn up the volume.  Or, plug the volume regulator in to the sound card, then the headset into the volume regulator.  The control over the volume using the volume regulator is quite good.  The sound volume responds quite well.

Icemat Siberia Multi Headset Volume Wheel

The sound quality in the headset is excellent.  Sounds being piped through these “cans” come through surprisingly clear at very, very low volumes and up through very, very high volumes.  The quality of sound is not an issue with this headset; rather, the quality of sound is largely dependant on your audio source.

The lows and highs come through very clear and were not at all distorted or splatty.  A few times during testing through various pieces of audio equipment, I had to take off this headset to make sure the audio wasn’t coming from my sound system.  Impressive, no?

My current setup consists of a Creative SoundBlaster 5.1, connected to a Behringer Eurotrack sound mixer, which in turn pushes audio out to a set of Logitech Z-2200 speakers.  Tested through each piece of equipment in stages, the audio quality of the Black Siberia remained constant and pleasing to the ear.  Now that this headset has proven itself through commonplace audio equipment, it’s time to give the USB Soundcard a try.

Computer Maintenance & Care

If you are reading this, it’s a fair bet that you have a computer sitting in front of you, be it a PC, laptop or Mac.  You use it, and so it sits; fans whirring or water pumps humming.  The average user just leaves the machine alone and lets it do its thing.  It’s sometimes the case where these users have been told or have read at one time or another that “computers will break if you touch the wrong button”.  This is not the case.  Computers are tougher than you may think, but even the toughest things in life need some TLC at one time or another.  The question you want to be asking yourself is, “How can I show the care my computer deserves?”

Basically, computers are machines.  They are a mass of wires, capacitors, transistors, circuit chips and motors.  When combined, they go to create the machine you are currently using to view or print out this article.  Like any other machine, they are prone to breakdown, overheat and wear out over time.  It’s your responsibility as an owner of one (or many) of these machines to help prevent this from happening and to ensure that your computer has a long, happy life.

If there are two things that a computer fears the most, it would be heat and moisture.  One or the other (and even both combined) will certainly put an end to your computer’s life quickly and efficiently.  Heat can put a strain, and possibly fry, delicate circuitry and chips found everywhere inside your computer.  There is a certain operating tolerance for each individual computer, but once the heat becomes too great, you may be finding yourself shopping for new parts.  Moisture, on the other hand, doesn’t fry circuitry directly, rather, it causes shorts; electrical connections where there was never one intended.  For example, if a line that was never meant to carry more than 1V of power gets shorted with a line caring 3.3V, the 1V line would be overloaded and would certainly cause something to give.

Plain, distilled water (good ol’ H2O and nothing else) is not conductive by itself.  So, if it comes into contact with an electronic part, chances are it won’t do anything.  However, depending on how clean the part is, you may or may not get shorts.  Computer hardware usually has dust, dirt and metal particles clinging to the circuit boards.  So, if you try washing your parts with tap (or even distilled) water, these particles will get swept up by the water, and allow it to potentially become electrically conductive.  It is not a good idea to try.

What makes “regular” water more dangerous than distilled water are the sources from which it can come.  Most “regular” water comes from a tap or well, and contains all sorts of minerals, such as iron, lead, and fluoride.  The metallic particles in the water are what cause the electrical conductivity in the water, consequently can effectively short out your electronic components.

Never fear, however.  With the proper precautions and the proper tools, the dangers of heat and moisture can be averted.

Your Guide to Spyware

Spyware in General

Spyware: a term computer users have been hearing about more and more often during their travels through the World Wide Web, or through visits to the repair shop. Spyware is something that has been becoming increasingly common on systems. A system brought online with no protection is completely vulnerable within the first few minutes it is connected to the Internet. Statistically speaking, you have about 20 minutes before the system is completely loaded up with spyware and malware. It has become more of a common problem than virus infections. Most forms of spyware do not outright destroy your computer system, but rather, create various annoying issues and also result in an overall negative impact on system performance. It can sometimes render the speediest 3.2GHz system helpless, making it act like an old 266MHz machine on a good day. For you, the user, there has yet to be an instance where spyware helps in some fashion and while remaining free of any negative attributes. Spyware infests your system, compromises privacy and security, and goes on to bog down system performance and Internet bandwidth.

What is Spyware?

Taken down to its simplest form and to be quite general, spyware is a software technology that assists in information gathering. The kind of information being gathered depends on how the spyare was written and what it was made to target. Once installed on a system, it can collect password data, bank and credit data, information on web surfing habits, email addresses, or just about anything else that you may consider a breach in privacy. This information is gathered from your computer and then relayed over the Internet to advertisers and any other interested parties, as allowed and directed by the piece of spyware. This definition, however, does not include or apply to all forms of software that fall under the heading of “spyware”. A breakdown of the different categories of spyware will be covered later on in this article.

Why Should I Bother to Protect My System if it Contains Nothing of Value?

The Internet can be a great place to visit and can contain a wealth of information that is made readily available at your fingertips, but like anyplace else, you must exhibit a certain degree of caution while making your way around. Wariness coupled with awareness can go a long way to help combat spyware.

A common rebuttal as to not making a good effort in the area of system security is this common excuse: “I don’t keep sensitive data on my computer. Why would anyone care to hit my computer with spyware and malware?” Machines that can be easily compromised are usually turned into servants for launching larger attacks and flood their Internet connection as a result. In other words, your system will be quite easily turned into a zombie computer without adequate protection, which will go to hurt other computer users. Additionally, there can be a significant amount of data transferred while your computer is serving as this kind of host, and many ISPs have limitations on a user’s monthly bandwidth, which can include a speed cap or disconnection of service.

If you’re a firm believer in the argument that you “don’t have any important data on you machine,” just take into consideration that your computer has the potential for conducting illegal activities and privacy invasion. Like owning car, owning a computer comes with certain responsibilities that must be fulfilled so that harm does not befall others on the information superhighway.

Operating System Tweaks: Windows 2000/XP

Who doesn’t want a system that’s better, stronger and faster without having to shell out six million dollars? These Windows 2000 and XP Operating System tweaks will make your system feel like the Six Million Dollar Man without spending a dime. Optimizations take advantage of the dozens of options and features available in the Operating System. Although for a good many users, the default settings are fine, there is sometimes that extra “oomph” you’d like to squeeze out of your system. Before you start making alterations, make sure you are logged on as a Power User or Administrator to try out some of these tweaks. Included are primarily performance optimizations and general annoyance fixes for the two Operating Systems to help fine-tune your Windows experience. Some tweaks work on both Operating Systems; some only on one of them. Make sure that when there are conditions that need to be met for the tweak to work, that your system does in fact fulfill those conditions. Otherwise, who knows what may happen. That being the case, it’s prudent to backup your system settings before embarking on your tweaking adventure.

Prep the Engines

Before you begin, there are a few things that need to be addressed if you want to make the most of your system. First, get rid of spyware. It can be a major cause of bog downs. See the spyware section for more in-depth look at it and how to take care of it. The second thing is to get rid of any “maintenance suites”, such as Norton System Works and System Mechanic. These packages are chock full of utilities, that although may look pretty and go to act like a “swiss army knife” utility, but they really put a drain on system resources by including way more than what you really need. Uninstalling any “maintenance suites” you may have would drastically boost performance. In place of it, what could be your new suite could be composed of these programs:

Before progressing any further, the first thing that needs to be done is a registry backup. In the event that something goes wrong, you will have something to fall back on. Scrambling to find a fix to repair something that may have gone awry can be extremely difficult. To perform the backup, go to Start > Run and type regedit. Go to File > Export, and make sure under “Export Range” the “All” option is selected and that the file format is *.reg. Name the file and save it in a safe place.

Registry Backup Dialog

Data Recovery: Data Loss and Drive Failures

As fate has it, you wake up one morning to discover your machine will not boot. “Of course this can’t happen to me, it only happens to ‘other people’.” No matter what you think, hard drive failures can happen to anyone. You. Me. The neighbor down the street. The business owner downtown. It doesn’t matter. It happens eventually. Whether your system cost $500 or $5,000, a drive failure can really put a crimp on your plans. After all, the most valuable portion of your system is usually the data contained on the drive.

When you encounter a hard drive failure and/or data loss, your first thought is, “Do I have backups?” It is most often the case that backups of your data are non-existent, or if they are, they are severely outdated copies, which have been heavily modified on the now-faulty drive. What this guide is going to do is try to help you, the panicked user, to recover data off of that hard drive. Sometimes data can be recovered, sometimes not, but these tips will increase your chances of doing so.

First off, an operating system that will not boot is sometimes mistakenly recognized as hard drive failure. Viruses, spyware, corrupted installations/uninstallations, or any kind of tomfoolery within the operating system may render it non-bootable. However, this is usually the easiest situation where data can be recovered.

If you actually want the operating system working again, that’s a whole other story, and more than what will be covered here. There can be any number of problems or combinations of problems occurring that cause some sort of boot failure. Either a Google search or a visit to the PCMech Forums may prove useful in repairing the operating system.

So, what exactly is in a hard drive? Basically, you have a stack of platters onto which data is written. There is an actuator arm affixed with magnetic “heads” which read and write data on the drive’s platters. The actuator arm sweeps back and forth along the radius of the platters, while the platters are spun at a constant speed. Operating in this fashion, the heads can have access to the platters in their entirety. The data is written by the heads on each of the platters at a microscopic level where each bit is either a 1 or 0, depending on which way the bit is flipped. A bit is composed of two bands of magnetic iron particles, which can be represented as polar rods. Seeing as the heads are electromagnetic in nature, these bands can be flipped one way or the other, thus producing a “1” or a “0”, referred to as a “bit”. Eight of these bits used together is a byte, and depending on the way the disk is formatted, there is a specified number of bytes assigned to a sector. Then, an assigned number of sectors are grouped into clusters. Usually the smaller the cluster size, the more efficiently the space is used. On the other hand, the larger the cluster size, the more wasted space there is, but generally produces a slight increase in performance. Either way, the most efficient cluster size is set automatically with a default setting when you format your drive, depending on its capacity and file system used. Most of this probably sounds ambiguous, but it’s only to give general idea of how the hard drive operates and to make sense of some of the references later on in the article.

Hard Drive

Drive Platter

Needless to say, the important concept in data recovery is not how the hard drive actually works, although it helps to have a general understanding of it. Should you want to recover something that has been deleted, it is more important to understand how deleted files are handled.